Heads up! This content is relevant for Clipchamp for personal accounts. Try this link If you're looking for information about Clipchamp for work accounts.
On this page


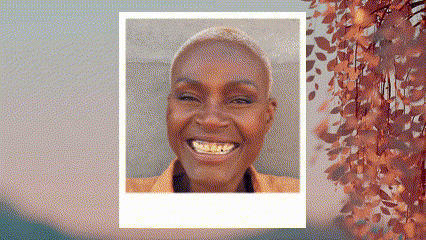
Want to make your videos stand out on the social media feed? With the picture-in-picture video layout, share two or more videos or images in the same video frame.
Whether you’re creating product demo videos, tutorials for school, or sporting highlights, the picture-in-picture video format is the perfect way to convey more information while making your video entertaining.
Read on to explore everything you need to know about the picture-in-picture video format and more ways to overlay effects like stickers and subtitles in Clipchamp.
What is a picture-in-picture video?
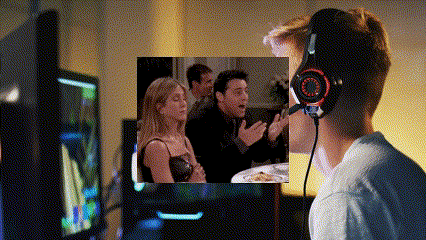
Picture-in-picture is a video format that overlays two videos, images, or assets in the same video frame. The picture-in-picture video layout lets viewers watch both media assets at once. Let’s look at what videos you can create using the multi-layer editing feature.
Gameplay and gaming videos
Walkthrough video tutorials
Demo videos and product tutorials
Virtual greetings and video cards
Screen and webcam recordings
Sports broadcasts and highlight videos
Education videos and language learning tutorials
YouTube intro and outro videos
News broadcasts
How to use picture-in-picture overlay in Clipchamp
Step 1. Import videos or select stock footage
To import your own videos, photos, and audio, click on the import media button in the your media tab on the toolbar to browse your computer files, or connect your OneDrive.


You can also use free stock media like video clips, video backgrounds, and stock music. Click on the content library tab on the toolbar and click on the visuals drop down arrow, then videos, photos, or backgrounds. Search through the different stock categories using the search bar as well.


Drag and drop your media files from the your media tab onto the timeline.
Note: Make sure your videos are stacked one above the other on the timeline. The video you would like to layer on top as the picture-in-picture, make sure to place it above your other video on the timeline.


Step 2. Apply the picture-in-picture video layout
To make your video an overlay, click on your video on the timeline so it's highlighted green. Next, click on the three dots button on the floating toolbar. Click on the picture-in-picture button, then select either top left, top right, bottom left, or bottom right buttons.


Freely move the video clip to reposition it inside the video preview. You can also create a picture-in-picture video layout using the video corners.


Step 3. Edit your video
Trim the length of your media assets
Easily trim the length of your videos using the green handles. Click on the video on the timeline so it’s highlighted green. Move the green handles to the left of the timeline to trim the video length. You can also use the multi-item editing feature to trim multiple assets at once.


Add filters to change your video aesthetic
To add filters, click on the video on the timeline so it’s highlighted green, then click on the filters tab on the property panel. Here, you can find many different filters to apply to your videos. Hover over the filter to preview, then click on the filter to apply.


Add subtitles to your video
To make your video easier to watch on mute, add captions. Click on the captions tab on the property panel, then click on the turn on autocaptions button. Follow the on-screen prompts to add subtitles to your video.


Step 4. Preview and save your video
Before saving your new picture-in-picture video, make sure to preview by clicking on the play button. When you’re ready to save, click on the export button and select a video resolution. We recommend saving all videos in 1080p video resolution for the best quality. Paid subscribers can save in 4K video resolution.


For more help, check out the help article.
Edit with more video overlay effects
Enhance video with frame overlays
Choose neon flashing lights or decorative vintage frames to level up your video’s appearance with frame overlays. Video frames are also a style of picture-in-picture video format, where a frame can be overlayed on the top of a video or image. You can also place videos in a split screen format.
Personalize with logos and watermarks
If you want to keep your branding consistent and recognizable, upload your logo image or by using the brand kit, then add your logo as a video overlay. You can easily turn down the transparency to make your logo a watermark as well.

Intensify humor with GIPHY reactions and stickers
Add personality and style to your videos by overlaying GIPHY reactions and stickers. Make your videos more informative with word stickers and annotations or elevate reactions with funny GIPHY memes.
Refine with automatic subtitles
Add clarity to your videos using various styles of animated text overlays and subtitles. Choose from a selection of fonts, colors, sizes, and positions to suit any video.

For more help using the picture-in-picture feature, check out the YouTube tutorial.
Frequently asked questions
How many videos can I overlay at once?
There is no limit to how many assets you can overlay on the timeline in Clipchamp. We recommend keeping overlays professional and simplistic.
Is a filter also an overlay?
A filter and overlay are two different editing techniques. A video filter is an effect added to your video clip to edit its appearance like color and tone. An overlay does not change the appearance of your video but adds another layer to it. Try editing with filters and overlays using our online video editor or the Clipchamp Windows video editor app.
Is a video overlay transparent?
Video overlays aren’t see through layers, but you can edit the transparency of your asset to make it look like a transparent overlay. Just drag the transparency slider in the adjust colors tab on the property panel to the right to make your asset more transparent.
Is green screen an overlay?
Green screen is a filter, not an overlay. If you would like to make green screen filter an overlay, just layer two assets on top of each other on the timeline.
Want to explore more video formats? Check out how to make split screen videos and YouTube reaction videos.
Elevate your editing skills and make your videos look more professional with the picture-in-picture video format with Clipchamp or download the Clipchamp Windows app.


